Integrating Git with Android Studio with GitHub as the hosting platform
Content
- Preparing for a GitHub account
- Git installation
- Enabling Git in Android Studio
- Integrating GitHub with Android Studio
- Commit, Push into GitHub
- Collaboration on GitHub for Android Projects
- GitHub Classrooms
<This is only applicable IF you do not have GitHub set up of having problems with the existing set up on your laptop>
Sign up for an account @https://education.github.com/pack
Do remember to use the RP student email account.
Some initial read up on GitHub to understand the various operations that can be done using it
https://guides.github.com/activities/hello-world/
http://rogerdudler.github.io/git-guide/
http://www.vogella.com/tutorials/Git/article.html
https://code.tutsplus.com/tutorials/working-with-git-in-android-studio--cms-30514
Step 0 - Installation file preparation
Download it athttps://github.com/git-for-windows/git/releases/download/v2.26.0.windows.1/PortableGit-2.26.0-64-bit.7z.exe
Step 1 - Installing Git
Run the installation file from Step 0
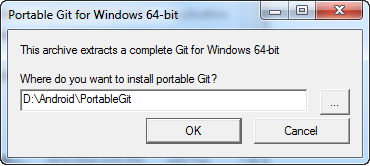
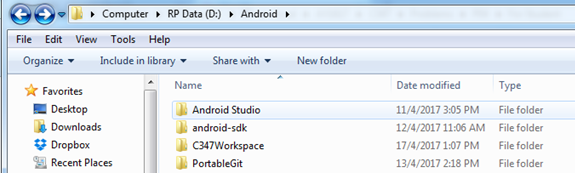
Do choose to install Git at the folder created for Android IDE installation. For example, D:\Android\PortableGit
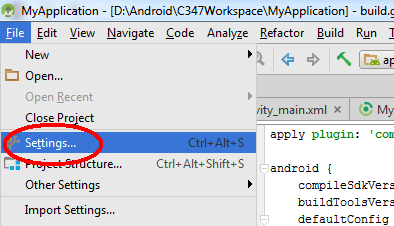
Step 2 - Setting up Git in Android Studio
- Go to the Settings page. It can be accessed from the main starting screen shown below
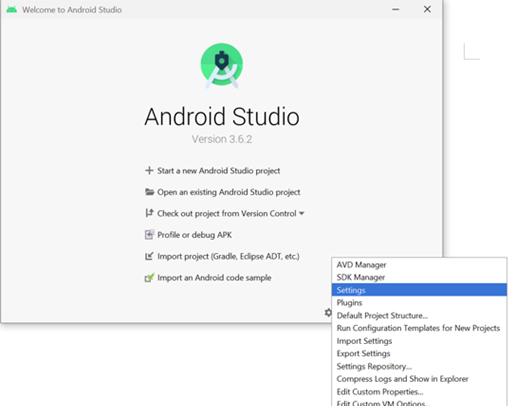
Alternatively, the Settings page can be accessed from here
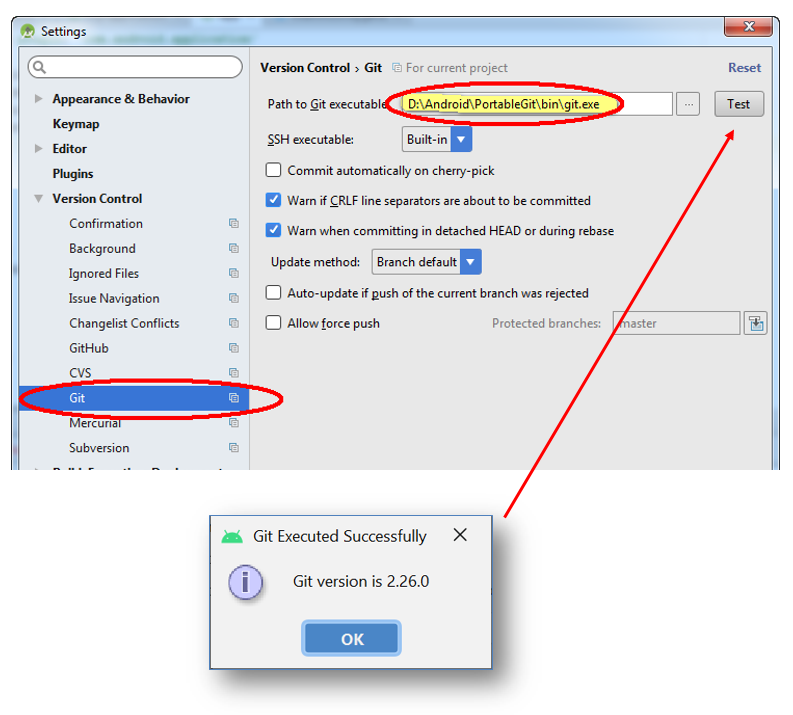
- Enter the path to the git.exe from the Git installation at Step 1
To verify the link to the git.exe, click on the "Test" button.
- Next, do enter the Github account credentials in the Github entry
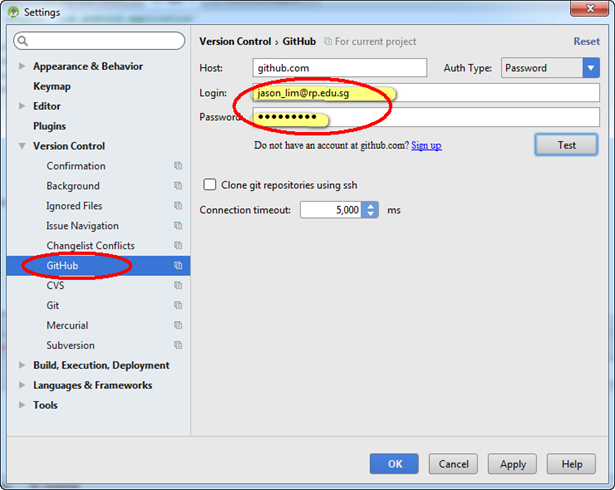
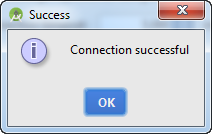
To verify the connectivity to the GitHub, click on the "Test" button to look for this:
Note: It is NOT recommended to have multiple accounts of GitHub to be used in your laptop. You may encounter issues relating to pushing code into GitHub. You can add multiple emails into you GitHub account (usually used to upgrade your personal GitHub account to obtain education benefits by including your RP email).
Importing into Github (initial commit)
This is to set up a project in your repository at Github.
Step 1 - Create an Android project in Android Studio or choose any existing project to be imported
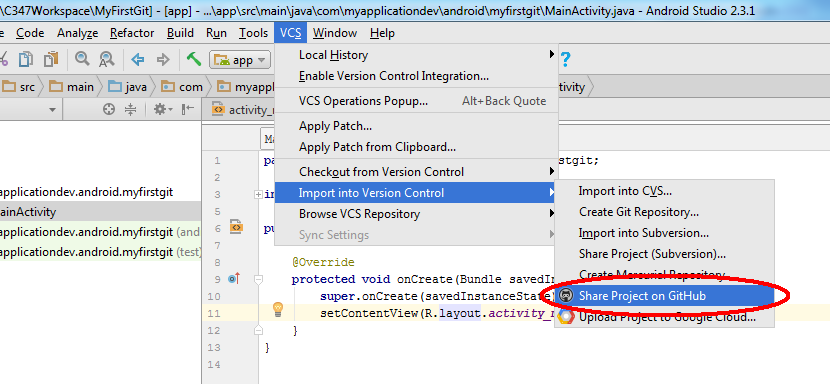
Step 2 - At the VCS menu, choose Import into Version Control -> Share Project on GitHub
Step 3 - Project creation and upload @ Github
- With the GitHub settings done prior to this, you would be seeing the below window
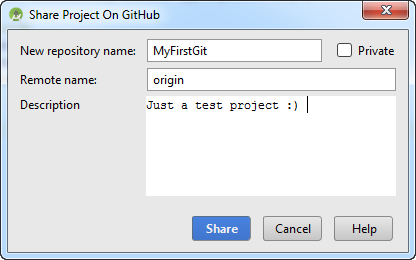
You can leave the remote name as the default value. As for the description, do input something useful and descriptive of your project. This could be your portfolio :)
- The following window will pop up, showing the files going to be committed to the repository
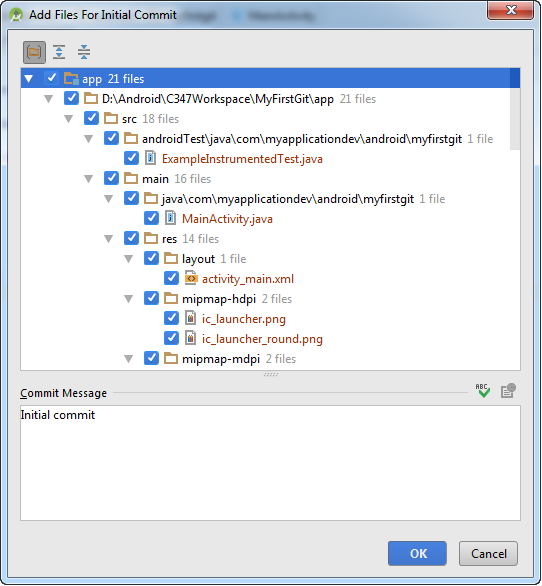
The commit message is supposed to capture the changes done for every commit. Do note that commit is not referring to "save" in your Android Studio. The commit is akin to the closing of sales of a day or whenever there's something major.
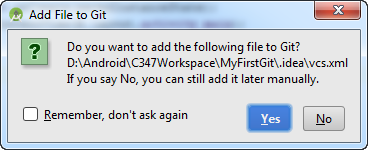
- If you see the following pop up window, you can just click "no" for this pop up window. Basically, we would want to commit only essential files, transient files are not required.
Transient files here are referring to files that are generated by the IDE pertaining to user specific settings, definitely not critical to the project.
Note: To know which are not required to be committed into a repository, you can refer to this templatehttps://github.com/github/gitignore/blob/master/Android.gitignore
You can also copy its content into .gitignore of your project to automate file exclusion
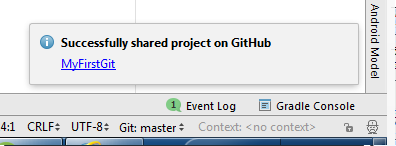
- Upon completion, you'll see this pop up box on the lower right.
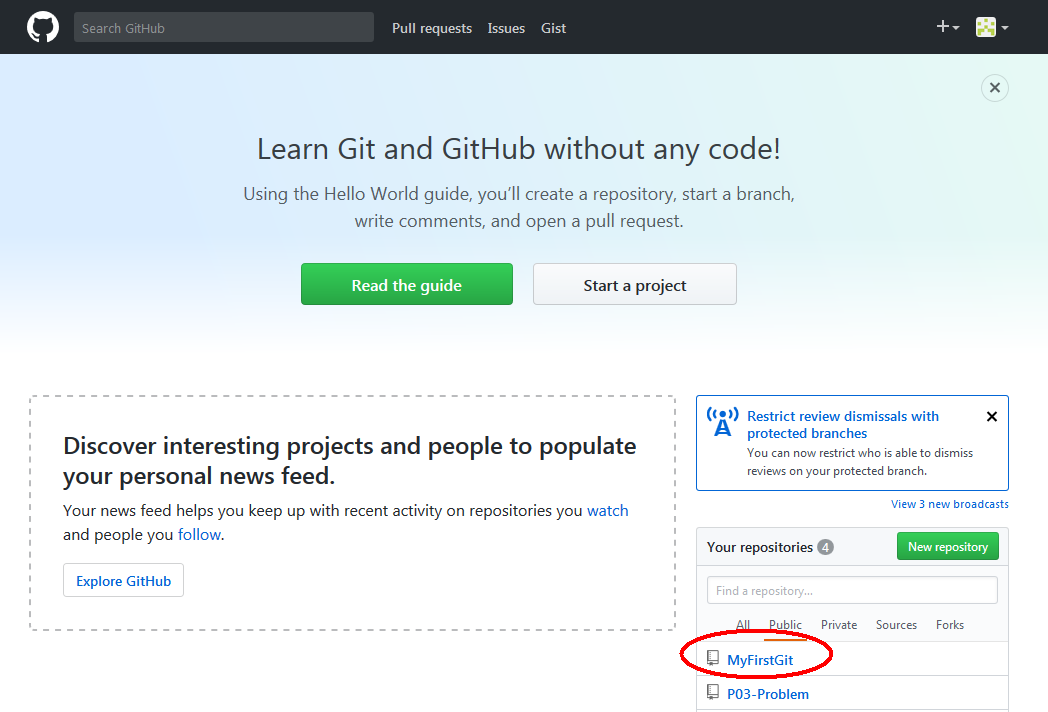
- Go tohttp://github.com with your account logged on, you'll see the repository is created and the files are committed in it.
Code changes
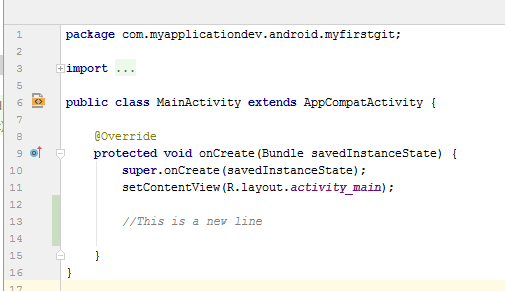
As you make changes to the project on the Android Studio, the IDE is keeping track of what you have written. The changes will be saved in your local storage as you continue on your development.
Usually when a significant milestone is reached, you are probably ready to commit. After a commit, you will still need to push the changes into the remote repository (GitHub). Otherwise, the code changes only stay in your computer, not on GitHub online repository.
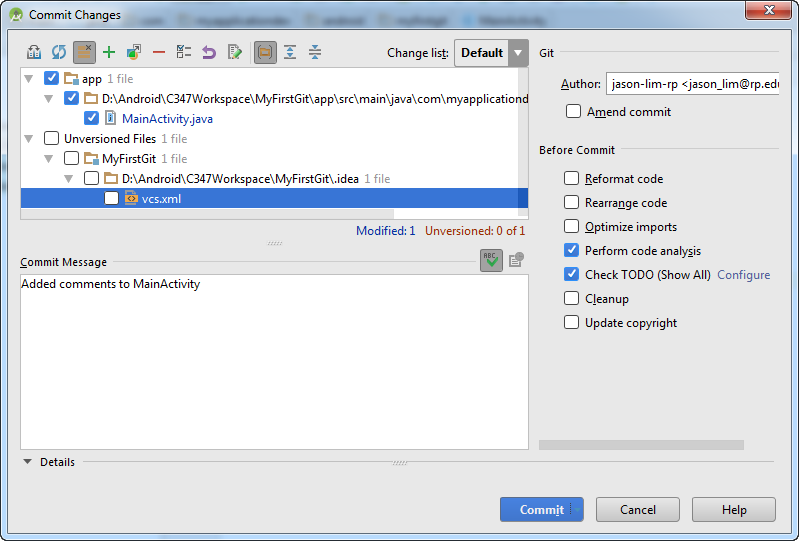
The following screen will appear. It's a necessary practice to summarize the code being committed. The idea is to capture the essence of what is being committed into the repository.
Notice that vcs.xml is unchecked since the file is not required to be committed.
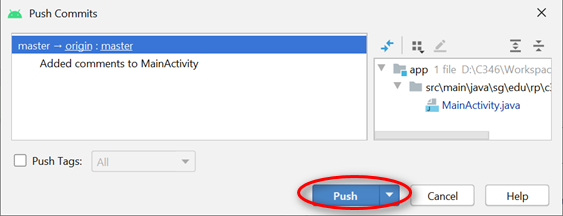
Note: To effect the changes to the remote repository (in this case, GitHub itself), you need to push the changes over.
File adding/removal
Whenever you add a new file, Android Studio will prompt if you want to add to Git.
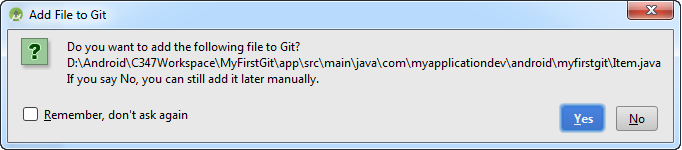
*Note: At this point, it is marked to be added to the repository. However, the real adding is only when you commit into the repository.
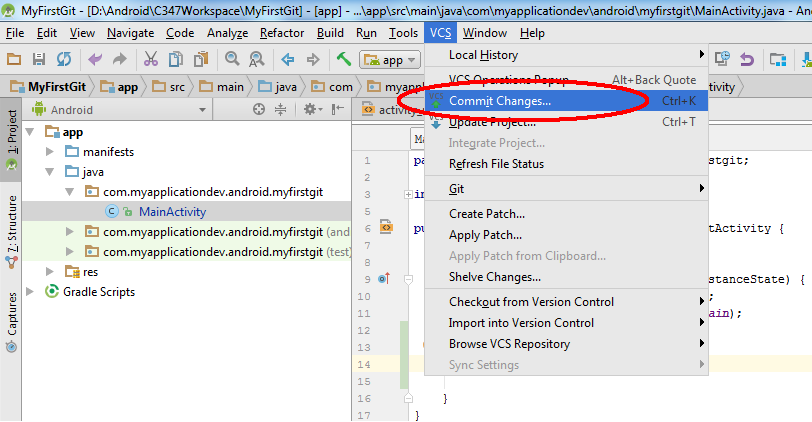
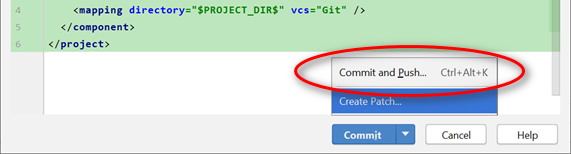
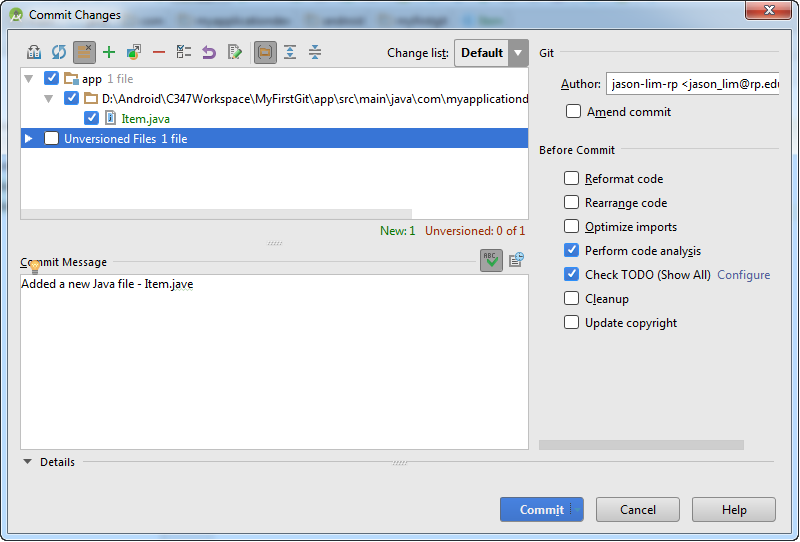
To commit the new file, choose commit changes from the VCS menu. The screen below will appear and do provide the summary for the commit as well.
After which, you need to push (commit + push) the changes over to GitHub
Commit vs Push
As you continue to code, you need to make sure the changes persists. What we do is to save the changes. When the code are saved, it resides in the storage, eg. in harddisk.
For Git, one should commit when a milestone is reached. Along with it, a summary of changes and progress should be provided. This is to track the changes and to allow roll back, if necessary. However, at this point, the progress is not sync to the Github repository yet.
To sync it, one needs to push to the Github. Push should be done only when you want to sync to the Github or need the changes to be reflected to the rest of the collaborators.
How-To
To update changes to the code from the repository, you can choose update from the CVS menu
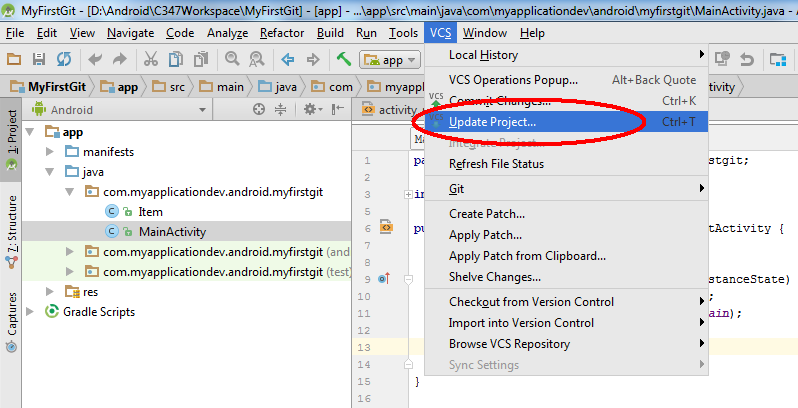
This is useful if you happen to use 2 different laptops to develop a project. Or the project is jointly developed by multiple authors.
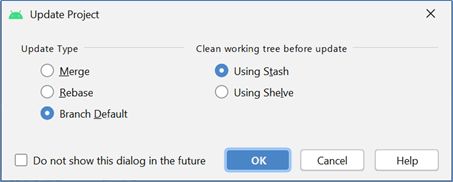
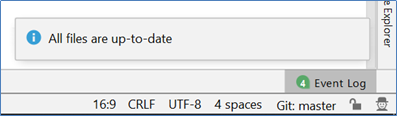
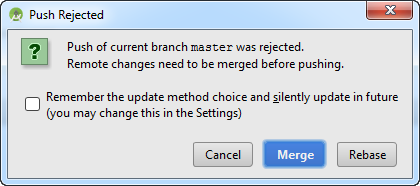
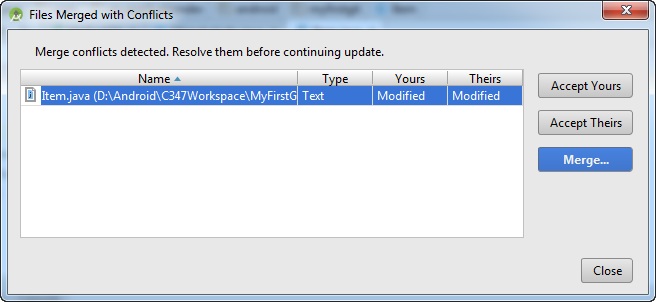
Click OK to proceed. All the files in your Android Studio will be up-to-date. Uncommitted code will be stashed away or merge. De-conflict needs to be done manually.
Why?
Due to the projects can be located in a distributed manner, a Github project can be cloned to many different locations or by different collaborators. As the different local repo can be accessed and modified independent of one another some concurrency issue might be raised.
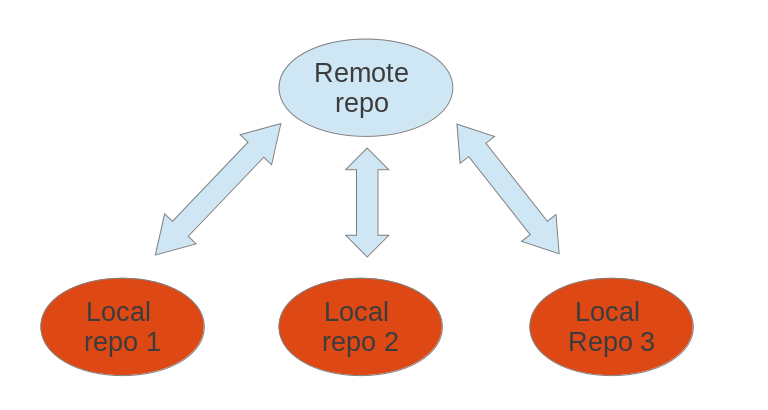
There's a possibility that there will be a conflict during update or commit. A conflict is due to changes made to the repository from the last time your copy of the project was updated.
This could happen when there are more than 1 contributor/author for the project and they are making changes concurrently over the same period. Example, in a day, both authors try to commit changes to the same file.
When a conflict happens, it can be due to the following:
- iThere are changes to the code in the repository since the last time you updated your local code
- Multiple collaborators doing some changes to the same file
Resolving conflicts
You need to resolve the conflict. Typically a window like this might show up. This is for you to decide which version of the code to keep.
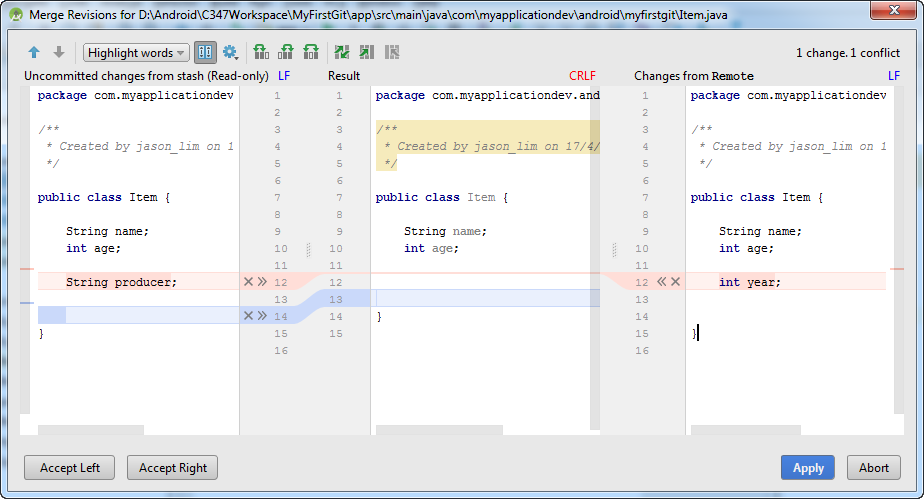
There will be times, the Android Studio will just prompt for merge. That's to merge your changes to the changes another collaborator has done, before you commit your code and after you check out the project.
The idea is to look at the changes and to decide whether to keep your copy, other's copy or merge the code.
Need more help? Look at this:
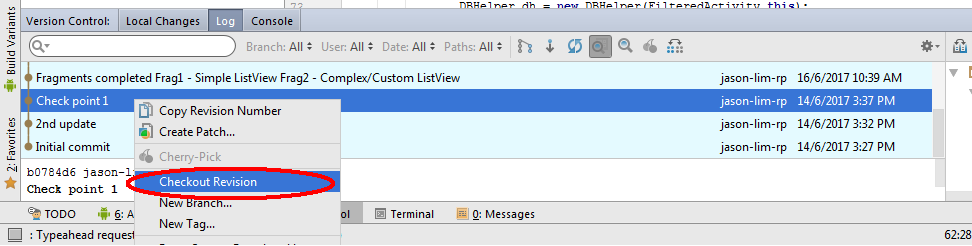
Enable the Version Control view in Android Studio. Alt+9 -> Log
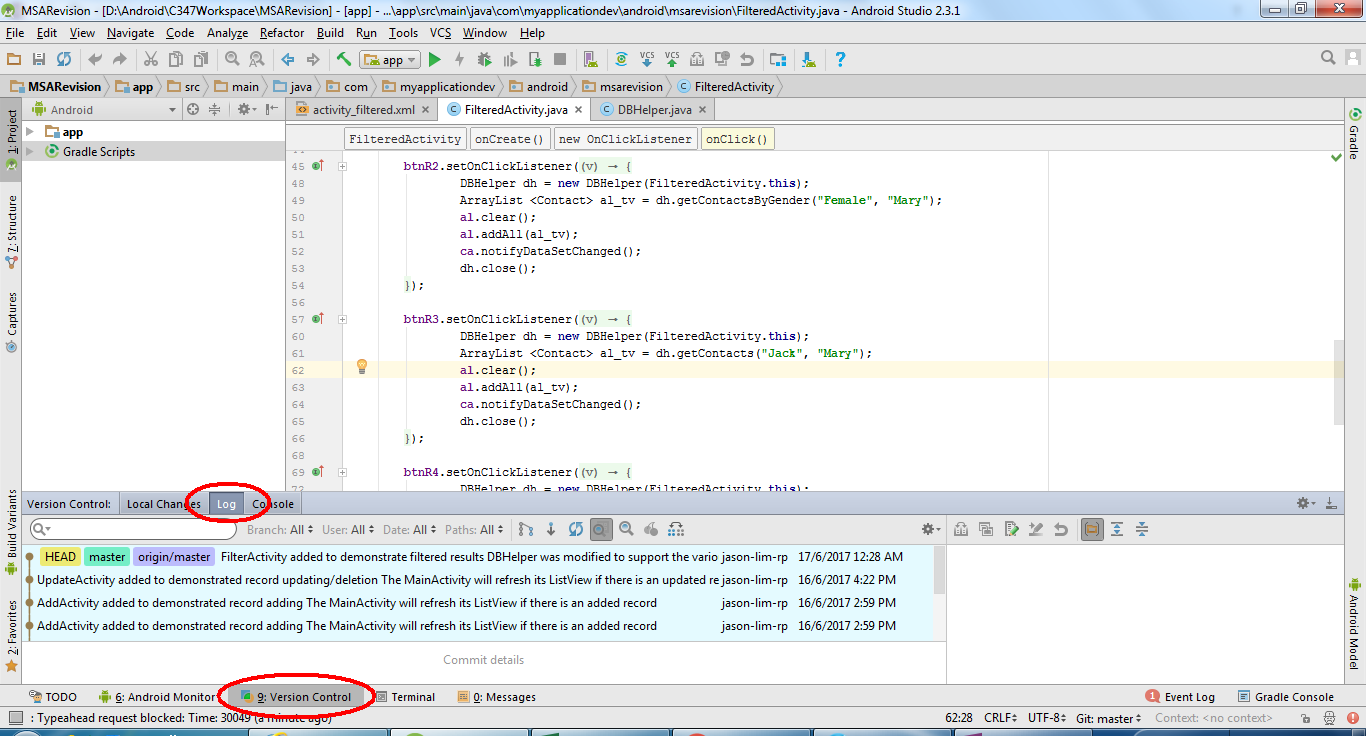
This displays the list of commits done in the repository.
All the commits are shaded light blue. Just select the required commit and checkout will do.
From this, it is shown that commit messages are important to give a glimpse of what you have done
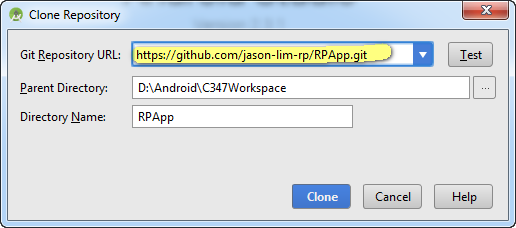
To check out a project from the Github, it's quite straight forward as the Android Studio has an option for it.
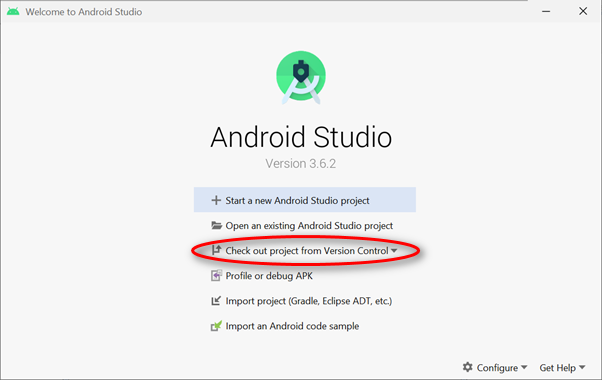
What you need is the link to the project on Github as well as where do you want to store the project.
What's next?
- If you are an assigned contributor to the project on Github, you can make changes to the project by committing and pushing new/edited code.
- If you are not an assigned contributor, or if you only want to use the Github project as a baseline and turn it into your project (it's called forking), you could in turn, import the checked-out project into your own repository.
To do that, just follow the guide on Import into Github (Setting up repo)
- Log in to Github, navigate to the project that you want to allow collaboration with the others.
- At the project, click on the Settings tab. At the Collaborators bar at the navigation bar on the left, you could add collaborators.

Collaborators must be a GitHub registered member and they could be found by inputting their username.
The collaborators would be invited. Upon acceptance (check your emails!), they would be able to make changes to the project.
- Log in to Github, locate the repository.
- You must fork the repository
- Clone your fork version of that repository
- Through the command line, navigate to your clone directory then add upstream version (original repository):
$ git remote add upstream https://github.com/fcannizzaro/material-stepper.git
You can check it using the line $ git remote, and you will see origin and upstream. - Make changes → commit them → then push (all of this happen on your repository (forked one), not the upstream).
- Go and check the network graph for both the forked and original repositories.
- Go to the GitHub original repository's link and click pull request.
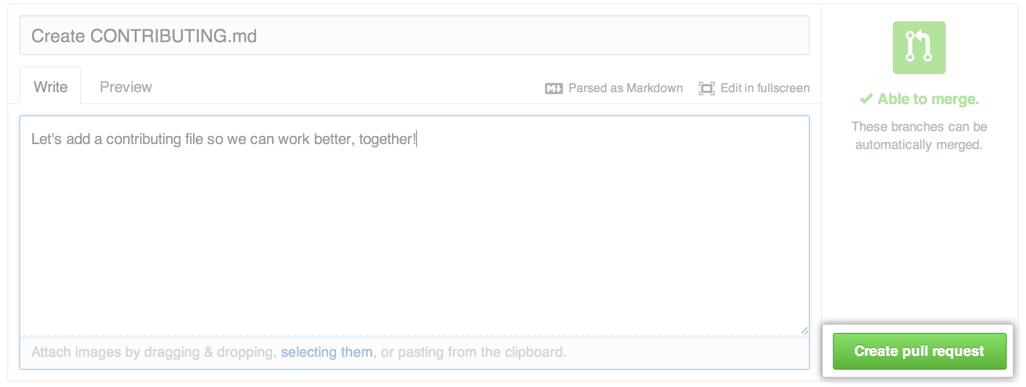
- Do as described in this image:

- And fill the others field and click Create pull request
Thanks for Erik Carlsten's tutorials.
(Src: https://www.youtube.com/playlist?list=PLlNpLMtnWblDyU14hzp40Fa6ZKDJ9UJsJ)
http://www.se.rit.edu/~swen-101/projects/Tutorials/Tutorial-4%20git%20teamwork.pdf
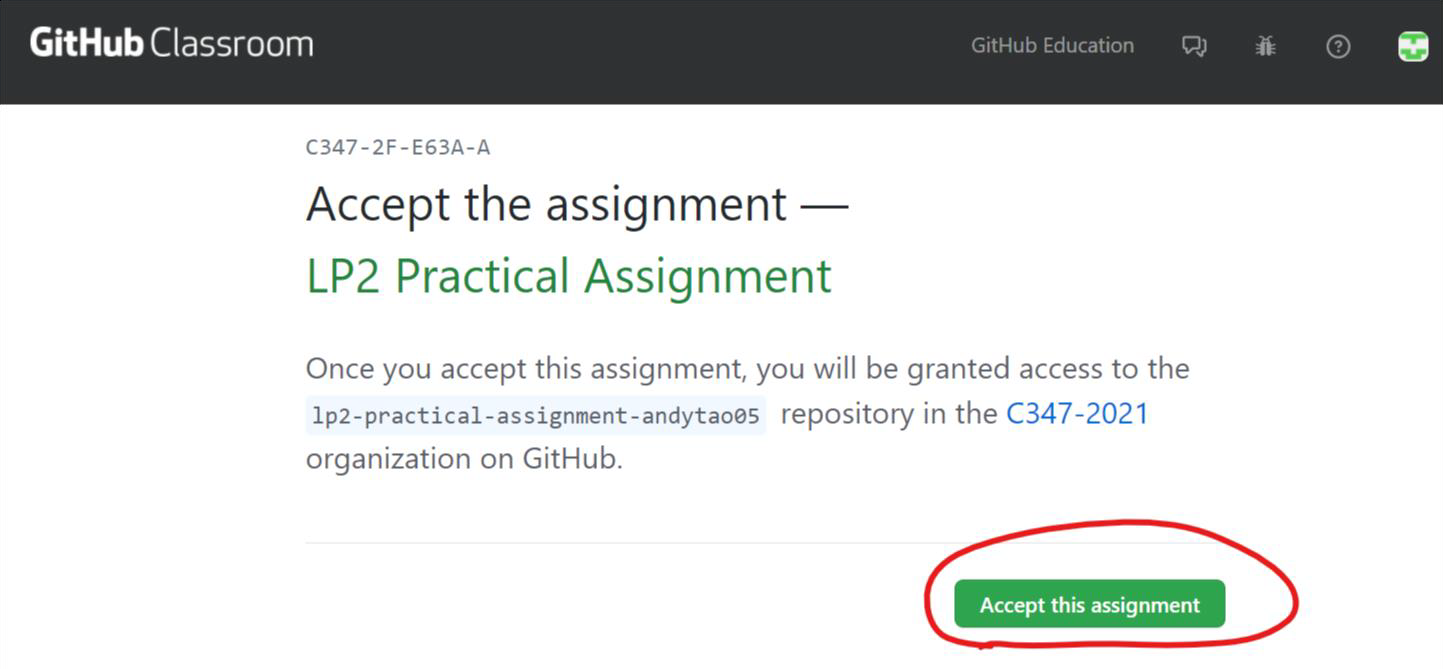
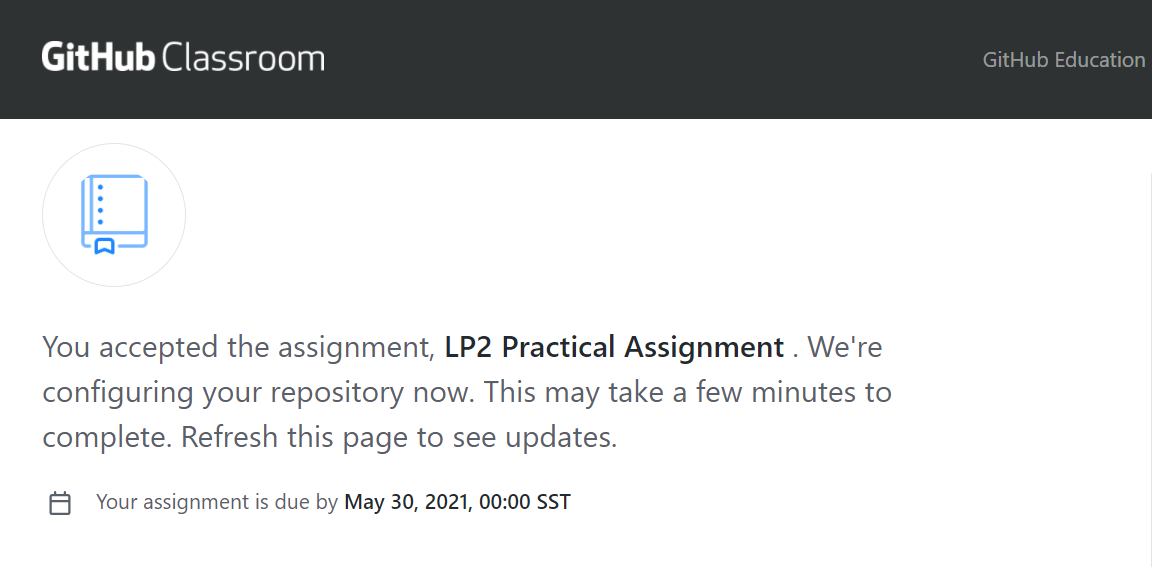
Pictures shown below are for illustration purposes only.
1. Visit the link provided by your lecturer and click ‘Accept this assignment.
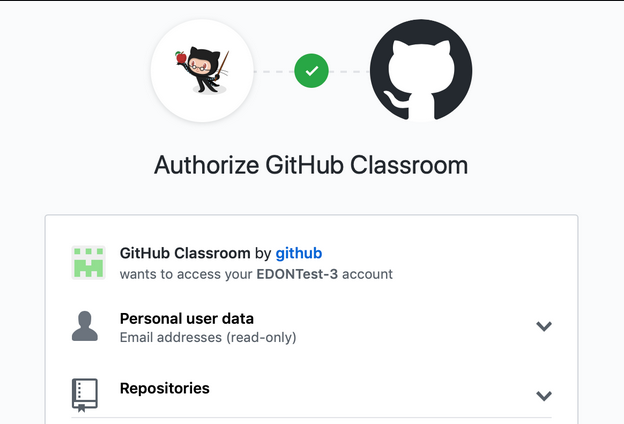
2. If this is the first time you are using GitHub Classrooms, you will be prompted to authorise GitHub Classrooms to access your GitHub account.
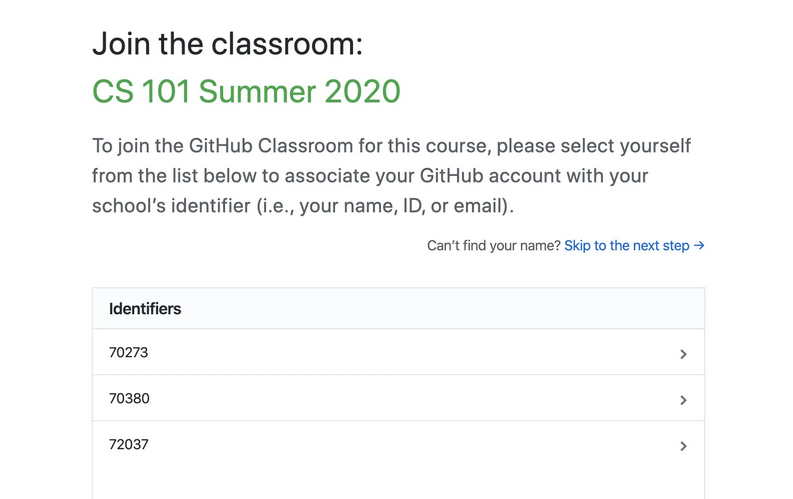
3. If this is the first time you are accepting an assignment for this class (Eg C346), you need to select your own student ID to proceed.
4. You should be seeing that you have accepted the assignment and the process of creating the repository is ongoing now.
5. Eventually, you'll get to this screen, showing the link to your assigned repository.
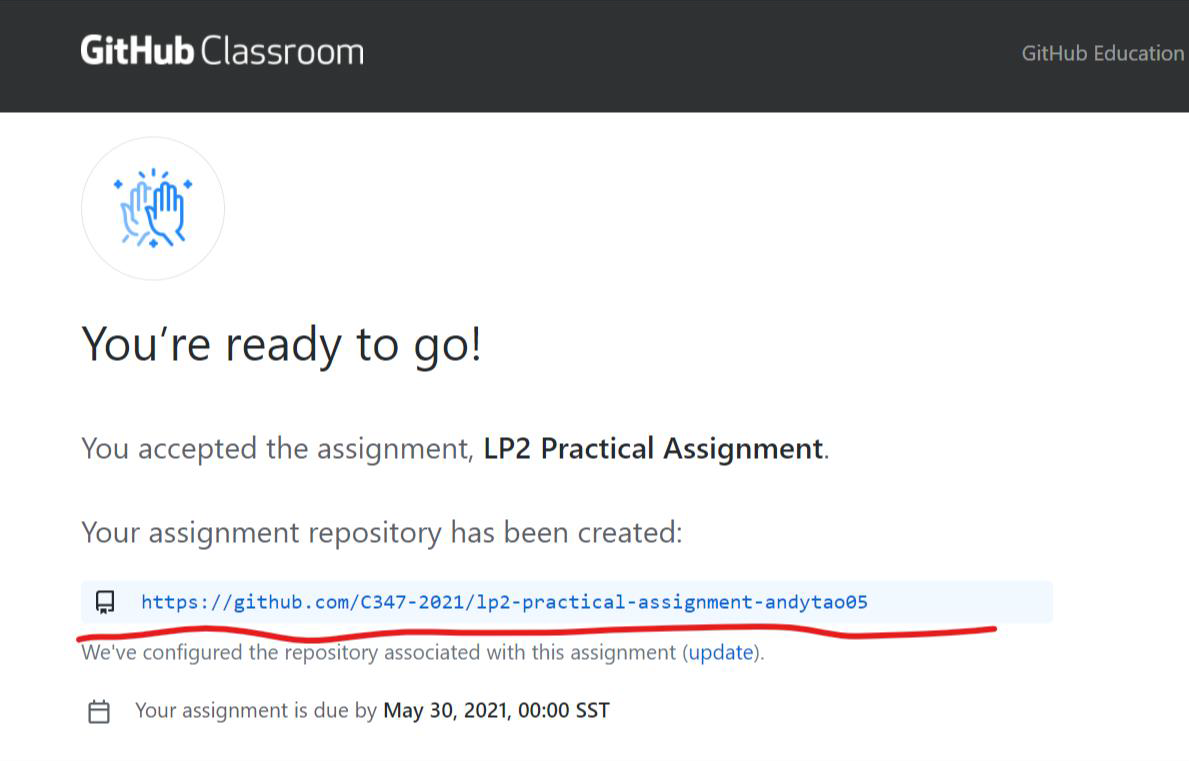
7. This is the repository that you need to commit your changes to. Note that this repository is NOT located at your personal GitHub space.
6. Proceed to clone the project from this repository and work on your assignment.